How to Get Good Quality on CapCut (Complete Guide)
As time evolves, Video content is becoming more prevalent; whether it’s a small business or a celebrity, captivating video matters to all. Quality video content is the essential key to making a solid digital presence. In this guide, I will share each aspect of how to get Good Quality on CapCut.
Introduction To CapCut
CapCut launched in 2020, and after that, this app started gaining popularity consistently. Due to its convenient UI/UX, newbies found this software best suited for themselves. It includes multiple features: blurring videos, transitions, templates, etc.
If you use CapCut Modified APK, then you can use CapCut without a watermark and ads.

Tips to get good quality on CapCut:
If you want to create high-quality and creative videos, then you can follow these tips.
How To Get Good Quality Video in CapCut
Upload The Video
Open the CapCut app and click on the “+” button at the center of the screen. Upload the video from the device you want to edit. Make sure the uploaded video is clear and sharp; it will help achieve the desired final result.
Add Filters
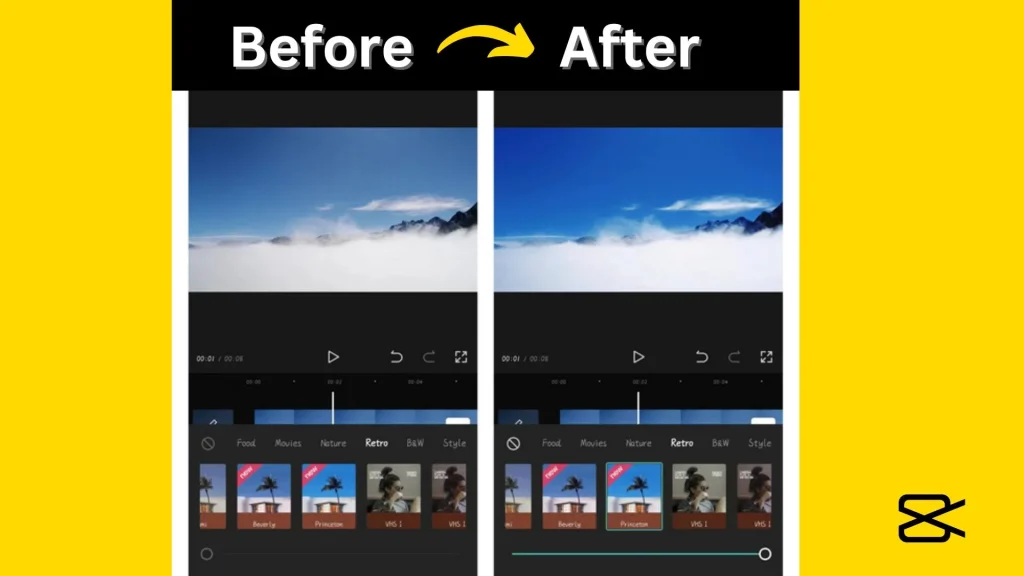
After uploading the video clip, there are certain filters available in CapCut to increase your video quality. To apply a filter, click on the “filters’ icon available at the bottom of the screen and select the filter that best suits your needs.
Add Transitions
By using CapCut, add smooth transitions to your video. Transitions, if added expertly, will improve the overall flow of the video.
Adjust Brightness:
Adjust brightness and colors using CapCut. Change brightness and colors until you are satisfied with the results. Make sure the colors you use are vibrant.
Add Text and Music
Adding text and Music will make your video more engaging and captivating. Consider adding relevant and exciting Music to make the video more attractive.
Change Frame Rate and Video Resolution
Now it is the time to choose the correct settings before exporting your video. Do this necessary to make sure that you will not get any blurry or pixelated results. To select the proper settings, click the top left button next to the “export” icon. Here, you will find the frame rate settings. Adjust the frame rate to 60fps and maintain a video resolution of 1080p to get clear and sharper results. These settings will also impact your video size.
Export in the Highest Quality
After you have made all the changes and are satisfied with the final results, click on the “Export” button at the top of the screen. Make sure to select the quality of your video.
What’s the Highest Resolution Accepted by CapCut?
When editing videos in CapCut, there are two types of resolution options available:
You can import videos of every quality, including 480p, HD, Ultra HD, and even 4k. CapCut doesn’t limit the imported videos, but your device matters for exporting premium videos.
The device on which you are using CapCut should be powerful; otherwise, CapCut will automatically compress your video quality to 1080p. In other words, you can import video of any quality, but for exporting, you need a device with a minimum of 8 GB RAM; otherwise, CapCut will automatically compress your video to 1080p.
Last Words
If you are a beginner in video making, the above tips can help you create high-quality and creative videos. You can use these tips to create engaging videos for your social media platforms like Facebook, Twitter, Instagram, etc.
